Administration manual
Note
You must be an Administrator in order to follow the procedures listed here
Administrators are the users with the most power in the website. They can create new (local) users and are responsible for maintaining parts of the website.
Other actions they can perform:
Assign roles to users (see Role assignment).
Update or create OAuth2 keys, which are necessary for CERN Single sign-on.
Update or create Checklists and Checklist items (see: Adding/Tweaking Checklist items)
Update or create remotescript configurations (see: Adding Remote scripts).
Role assignment
To assign the Shifter or Shift Leader role to a user, follow the steps below:
Make sure that the user has already signed in using the Login with CERN button.
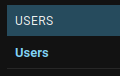
- Navigate to the users administration page

- Click on the Users link
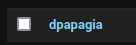
- Search for the user you want to assign the role to and click on their username:
- Under User privilege, select the appropriate role:

Click on SAVE
Adding/Tweaking Checklist items
Checklists are lists of items whose purpose is to to help the Shifter keep track of the required checks that must be done before certification submission.
These can be configured from the admin panel.
Adding new items
Checklists are composed of Checklist Groups. Checklist Groups, are composed of Checklist Items. So, if you need to add items to a specific Checklist:
Make sure the appropriate Checklist Group exists.
Create the new Checklist Item by select the appropriate Checklist Group they should belong to.
An example of a checklist structure:
![digraph checklists {
"Checklist Item" [color = green, shape = square, fixedsize=true, width=1.5]
"Checklist Group" [color = blue, shape = square, fixedsize=true, width=1.5]
"Checklist" [color = red, shape = square, fixedsize=true, width=1.5]
"Checklist Item" -> "Checklist Group" [style=invis]
"Checklist Group" -> "Checklist" [style=invis]
"Tracking" [color = red]
"Bad components" [color = blue]
"Tracking checks" [color = blue]
"Check TkMaps" [color = green]
"did we recover some 'known' bad component?" [color = green]
"If yes, what is the reason to be flagged as bad?" [color = green]
"did we recover some 'known' bad component?" -> "Bad components"
"If yes, what is the reason to be flagged as bad?" -> "Bad components"
"Check TkMaps" -> "Tracking checks"
"Bad components" -> "Tracking"
"Tracking checks" -> "Tracking"
}](_images/graphviz-c7e808e7218d0bce87d2a14f3c98e6b38a09a1ff.png)
Adding Remote scripts
Custom remote scripts can be added to CertHelper from the admin interface. Those scripts can reside in (virtually) any remote machine, assuming CertHelper has been configured properly to access it.
In a nutshell, CertHelper provides a GUI wrapper for configuring and executing remote bash scripts and fetching and displaying generated files.
Requirements for adding a new remote script:
Have the required access rights to the remote machine (e.g. username and password) and have them loaded in CertHelper (see.: Adding secrets to CertHelper).
The remote script’s absolute path.
The expected paths and filenames (in the form of a regular expression) of the generated output files.
For each new script that is added, a new automatically-generated page will also be created with the required inputs as a form, and HTML elements to display the expected outputs.
Create a new Remote script configuration
Click here to add a new configuration for the script to run.
Give it a Title to distinguish it from other scripts, e.g. “Trackermaps generation”.
Enter the Base command which is the command to run on the remote machine, e.g. “bash /data/users/event_display/ShiftRun3/TkMapGeneration/tkmapsFromCertHelper.sh”.
Enter the Host to run the command on (e.g. “vocms066”), Connection protocol
and Port to use to connect to it (e.g. “SSH - Keyboard interactive” and “22” for ssh).
Then, if connecting with Username & password, provide the names of the CertHelper secrets you created previously (not the actual values of the username and password!!!) under the Env secret username and Env secret password fields (e.g. “VOCMS_USERNAME” and “VOCMS_PASSWORD”).
It is also recommended to add some Help text, describing the script’s functionality, and some example values for its arguments. The Help text field accepts formatting such as bold, italics, hyperlinks, etc.
Click on SAVE.
The final configuration might look like this:

Add arguments to the remote script
Now that the script has been created, you will probably need to run it with one or more arguments. These can either be positional or keyword.
Each argument added to a specific remote script will add a new field in the form generated to get the inputs required from the users to run the script. For example:
Add a positional argument
Click here to add a new positional argument.
A Name, Type (e.g. integer or string), Position and Mother script must be specified.
The Type specifies the type of input that will be displayed in the form generated and the type checks that will be done.
The Mother script defines the script this argument belongs to.
Add a keyword argument
Click here to add a new keyword argument.
A Name, Type (e.g. integer or string), Position and Mother script must be specified.
The Type specifies the type of input that will be displayed in the form generated and the type checks that will be done.
The Mother script defines the script this argument belongs to.
Add expected output files to the remote script
If you expect the remote script to generate an output file that you want to fetch and make available to the user, you can add the required configuration to do so here.
You will need to specify the Directory in the remote machine where the file is expected to be found after the script execution and the Filename regex of the filename.
Filename validation
It’s possible that you will need to do some extra validation of the filename generated if, for example, the output filename contains some or all of the inputs specified by the script.
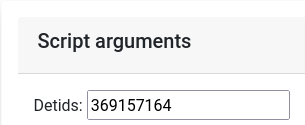
For example, the Single module occupancy plotter takes as inputs:
Positional argument 1: Datataking period
Positional argument 2: Reconstruction type
Positional argument 3: Run number
Positional argument 4: Module list
The generated file is in the form
<Reconstruction type>_<words>__<words>_<words>_<words>_<Run number>.png
For this case, we want to validate that the output file contains the Reconstruction
type (positional argument 2) and the Run number (positional argument 3) in the filename.
To validate the filename, you will need to specify the regex as
(?P<arg2>\w+)_(\w+)__(\w+)__(\w+)_(\w+)_(?P<arg3>\d+).png, where arg2 is considered
a special keyword (regex named capture group) that represents Positional argument 2, and
arg3 represents Positional argument 3, respectively.
Addendum
Adding secrets to CertHelper
Warning
Secrets should not be stored in plaintext. Ever. Make sure you follow the directions below.
Secrets, in this context, are variables loaded by Django at runtime using python-decouple and they should not be publicly available.
To prevent them being stored in a plain-text file like settings.py, they are
loaded as environmental variables, which are either found in an .env file
or created at runtime from the operating system: since we deploy on CERN’s
PaaS platform, environmental variables are created per-build. For example, for
CertHelper, they are created here.
To create a new secret, follow the steps below:
Add a new project Key/value secret for CertHelper here. Give the secret and the secret variable a distinguishable name, e.g.
vocms-secretsandusernamerespectively.Add a new build environmental variable here by clicking on the Add from ConfigMap or Secret, selecting the name of the secret you created on the previous step (e.g.
vocms-secrets) and the key of the secret you want to use (e.g.username). Give the new environmental variable a meaningful name, e.g.VOCMS_USERNAME. The secret is now ready to be used.You will have to rebuild the project now. See deployment. The secret is now safely available in CertHelper.